Sunday, 22 November 2009
Vintage Homes
This is foto is from a present exebihition on vintage homes at
Nordiska Museumet Foto: Peter Segemark
But perhaps this a bit more how most homes really looked in
Sweden in the 1930-40s ...
A picture perfect magazine home
Another museum home - The Aviation Museum in Cape May, NJ
Image from here.
Friday, 20 November 2009
Modern products - Vintage look, part 1
This is the delightful powder of Paul & Joe. They have several pretty make-up products with a vintage look. Especially their nail polishes and varnish bottles.
Perhaps some of you vintage lovers have other products you can recommend ?
This is probably the prettiest clutch I´ve ever seen ! Although new it has a distinct vintage look acquired by the attached vintage ornaments and would go beautifully with a black vintage 1940s dress like say this one below. An Adrian original from Dressing Vintage. This clutch and others can be found in a post by fellow blgger - Greetz from Tiz.
Thursday, 5 November 2009
Heightening The Bathroom Experience !
Gorgeous ! Don´t you just love bathrooms !
The first time I realised that a bathroom could be so much more than just the place where you wash your face was when I rented a furnished apartments were its owner had decorated the whole bathroom in pink including several delightful plastic flamingos !
Or this one ! Both bathroom images are from here.
Ofcourse, not everyone can afford such a sumptuous room like this... Still, it is possible to invest in one truly magnificent piece ...
Me want ! ;)
Or this one ! This small ( but deep) one is great when you don´t have a lot of space ! :) Both bathtubs are from www.antiquebaths.com
And even if you have like, NO money (sort of like me at the moment ...) You can still find ways to add little luxury to your bathroom experience like taking a beautiful body powder puff ...
and dipping it in a gold tin ( both from www.rachelssupply.com )
filled with heavenly vanilla scented body powder and then, after a long soak in the tub, dusting your entire body. I guarantee that you will have a " heightened bathroom experience" no matter what budget your on ! Here is a "make it yourself" recipe from Rachel's supply.
1 cup cornstarch
1/2 cup baking soda
1/2 cup tapioca starch
8 drops vanilla essential oil
30cc Pure Vanillin Powder
Combine powders and mix well. Add fragrance oil to absorbent cotton pad. Place pad with oil in container with powder, shake or stir well, allow to sit 24 hours, shake or stir again, allow to sit another 24 hours, shake or stir powder, remove pad and discard, place powder into containers, it is ready to use. Makes 2 cups powder
If you can´t be bothered with the whole mixing stuff and just want any easy "fix" Lush has this really nice body talk that you can buy online or in one of their many shops that you can put in any beautiful glass jar of your own choosing.
Thursday, 29 October 2009
The shapes of the 1940s
Tuesday, 25 August 2009
Snoods !
Some of these head gears however became quite elaborate as these beautiful pictures show where the every day snood has been made into a little work of art that could be worn with an evening dress ! The picture is from ca. 1940 The model standing is wearing a red silk crepe dress, with diamond and ruby jewel and the other, sitting,wears a royal blue silk jersey dress, matching snood, and sapphire and diamond jewels - Image by © Condé Nast Archive/CORBIS
If you have a talent for making things you may want to make your own snood. This is a pattern I found on knitting-crochet.com
From: FlossieB.
I have a snood pattern I made for my daughter 2 years ago. It is from a book I have written in the 1940"s. All of the patterns are from that time but I kind of remember what the one that Scarlet wore in "Gone with the Wind" looked like. I think this will work for you. Very simple and my daughter that has hair to her waist could get all of her hair in it. It is an open weave though. She had to use a pony tail holder and a few bobby pins on her hair to keep it neat.
Materials: (Medium size)
2 oz.4-py yarn (wool) I used acrylic
crochet hook :size 3 I think I used a "G"
1 yd. grosgrain ribbon.
22" round elastic
Gauge: 4 meshes = 3"
Ch 49.
Row 1: 1 long treble crochet (long tr.) in 12th st from hook, *ch 4, skip 4 st on ch . 1 long tr in next st; repeat from* ending ch 4, skip 1 st,. 1 long tr. in last st. Ch 9. Turn.
Row 2: 1 long tr in first long tr of Row below, * ch 4, 1 long tr. in next long tr; repeat from* ending ch 4, 1 long tr in 5th st of turning ch, ch 4, 1 long tr in same st as last long tr. Ch 9, turn.
Repeat last Row 6 times (23 meshes). Ch 9, turn.
Row 9: Skip ch 4, 1 long tr in next long tr., * ch 4, 1 long tr in next long tr; repeat from * ending ch 4, 1 long tr in 5th st of turning ch. (23 meshes). Ch 9, turn.
Repeat last Row 7 times, ending last Row ch 5 instead of 9.
Row 17: Skip ch 4, 1 long tr in next long tr, work even to within 2 meshes of end, ch 4; yarn over 3 times, insert hook in next long tr and draw up a loop, over, take off 2 loops 3 times in succession, wrap yarn over hook 3 times, insert hook in 5th st of turning ch and draw up a loop (6 loops on hook), over, take off 2 loops 3 times in succession, over, take off 3 loops (a decreasing long tr), ch 5 turn.
Row 18: Skip ch 4, 1 long tr in next long tr, work 18 meshes, ch 4, work a decreasing long tr in last 2 long tr. Ch 5, turn.
Decrease 1 mesh each side of each of next 6 rows as in last Row. Ch 1, do not turn.
BORDER: Sew ends of a 22 inch piece of round elastic together. Working around elastic, work 2 sc in each mesh on entire outer edge, join with a slip st to first sc. Fasten off.
Make a tailored tie of ribbon and sew to front of snood.
*** note*** Along treble (according to the book) can be made by yo (Yarn over) any number of times and still drawing through 2 loops at a time, until one loop remains on hook.
I think I just did a regular treble crochet (tr) except where it stated. I would have to make this again to really remember. Good luck with this.
If you, as I, have no inclination what so ever to crochet, knit or sew... ;) Then you should check out these pretty snoods at Arthelias attic on Etsy. They are only 9.99 USD.
Monday, 3 August 2009
Going away for a while...
Friday, 31 July 2009
Beauty has many colours..
Thursday, 30 July 2009
A transforming product - lipstick !
Make your own Cold Cream !
The lovely Fleur de Guerre wrote a post about that most classical of creams - cold cream. This was such a staple ware in the the lives of the 1940s woman. She would use it to clean her face with or use it as a face mask in the evening. Read Fleurs post here.
For those of you vintage lovers that want to try making your own I found the below recipe. I made one little addition, some rose oil for fragrance. If any one of you ladies give it a go, please let me know how it went.
Also, if you like making your own skincare products, you might want to try the recipe for Floral Water that I posted on my other blog.
HOMEMADE COLD CREAM
1/4 teaspoon borax
1/4 cup distilled water
1/2 cup oil that is liquid at room temperature (Almond is nice)
1/2 ounce (by weight) grated beeswax ( about 2 tbs )
If possible work with glass containers as it can get a little messy.
1. Dissolve the borax in the water. Set aside.
2. Mix together the oil and beeswax.
3. Heat the oil/beeswax mix in a microwave until the beeswax is melted in and the mixture is clear. Or you can put the beeswax in a container that you then put in a pot of water. When the water starts boiling the wax will slowly melt.
4. Heat the borax/water mix in a microwave or on the stove for a minute - almost to boiling.
5. Slowly pour the borax/water mixture into the oil/beeswax mixture, using a stick blender to mix as you pour.
6. Beat very well with the stick blender until the mix is glossy white and slightly thick. If you wish you can put a few drops of essential rose oil into a little almond oil and mix in for fragrance.
7. Pour the (hot) cold cream into a jar with a lid and let it cool to room temperature.
NOTE: If you don't have a stick blender you can beat the cold cream with a whisk or in a regular blender, but the cleanup will be much more difficult.... By using glass containers and a stick blender you will be able to simply wipe most of the excess off with paper towels, then wash in hot soapy water. Cleaning plastic measuring cups, and a whisk or (worse yet) a blender of this wax-containing product is difficult and a pain in the neck....
Wednesday, 29 July 2009
How to refill a vintage powder compact
Another great beauty recipe ! I have several compacts that it would be nice to be able to use.
Tuesday, 28 July 2009
Morning becomes me... ;)
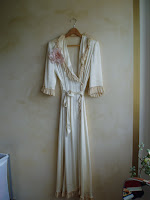
Ms Rosina Lee wrote a really neat post on gloves on her blog. It´s great - check it out ! Here is as promised, a picture of my vintage 1940s much loved dressing gown.
Monday, 27 July 2009
Sweet dreams are made of this ...
Housecoats - a modern days morning robe ?
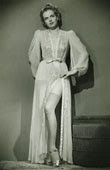
A housecoat or a duster, was worn when women in the 1940s were cleaning their house in order to protect what they were wearing for the day. Housecoats, long buttoned robes of light fabric ( but could also be made of warmer material ) became popular since they covered more than aprons or pinafores. A housecoat was an informal evening wear, usually roomy with buttons or a zip in front. Lengths were knee length or longer. Another way to use it was as robe over ones underwear, for instance when you needed to do hair or put on makeup.
Blouses of the 1940s
Saturday, 25 July 2009
To Dream about...
I´ve wanted a corset for a long time, but feel I need to loose some weight first... On the other hand that IS the whole idea with a corset, I mean to hold in what you already have ;) My favourite shop is "What Katie did" - I LOVE everything I see there ! This pink corset is another little daydream of mine !
Here´s how you put on a corset correctly.